

A well-built coop can still be vulnerable if strong wind gets underneath it. Knowing how to secure a coop against high winds starts with anchoring the structure to the ground, then removing loose materials and protecting openings that could catch a gust. The goal is to strengthen the coop without blocking the airflow your flock needs.
If a storm is approaching, look beyond the walls and roof. An unsecured feeder, waterer, or yard item can also become a hazard. A simple preparation routine helps protect the coop and keep the flock’s shelter orderly.
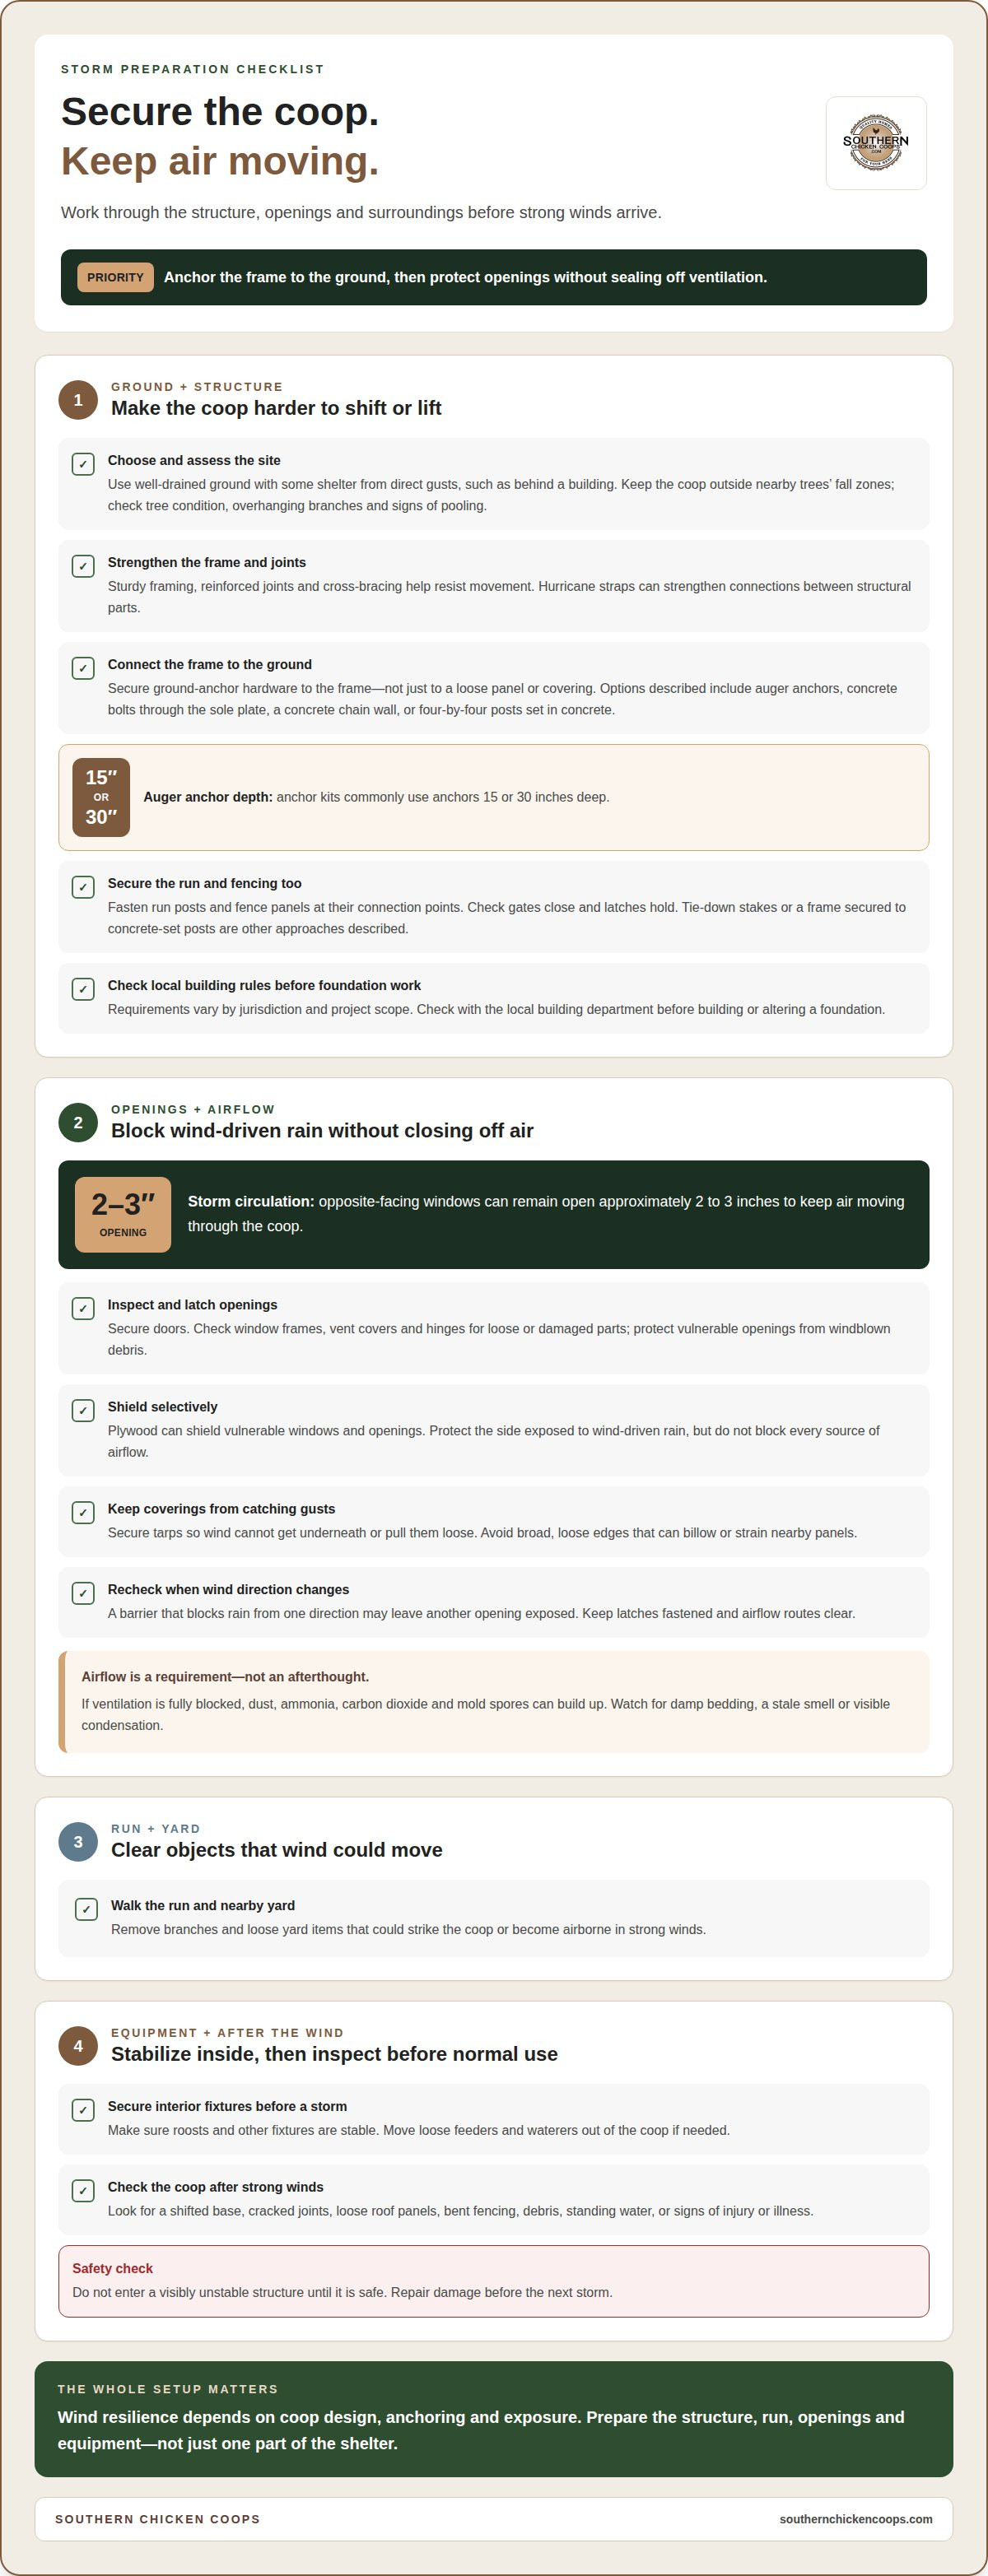
Focus on anchoring and bracing the coop, shielding it from wind-driven rain while maintaining ventilation, clearing loose objects from the run, and securing interior equipment. If you’re choosing a coop for Texas weather, consider how its construction and anchoring suit the site.
Key Takeaways
- Anchor the coop securely to the ground and reinforce its frame so gusts are less likely to lift, tip, or shift it.
- Shield openings from wind-driven rain without blocking airflow; opposite-facing windows can be opened about 2 to 3 inches for circulation.
- Remove branches and loose yard items that could strike the coop or become airborne in strong winds.
- Before a storm, move loose feeders and waterers out of the coop if needed, and make sure roosts and other fixtures are stable.
- A coop’s ability to handle wind depends on its design, anchoring, and exposure, so prepare the whole setup rather than relying on one wind-speed figure.
Anchoring the coop against strong winds
A practical plan for how to secure a coop against high winds starts with its location, frame, and connection to the ground. Work through these steps before severe weather arrives.
-
Assess Wind Exposure and Nearby Hazards
Choose a well-drained site with some shelter from direct gusts, such as behind a building. Keep the coop outside the fall zone of nearby trees, considering each tree’s height and condition. Check for overhanging branches and signs of pooling. After placement, note which sides are exposed to wind, especially doors, walls, and the roof.
-
Choose Wind-Resistant Building Materials
Sturdy framing, reinforced joints, and cross-bracing can help resist movement as gusts push against the structure. Hurricane straps can strengthen connections between structural parts. A concrete chain wall can provide a foundation, while four-by-four posts set in concrete offer another anchoring approach. Retrofit costs depend on the coop’s condition, materials, foundation, and work required.
-
Check Local Building Codes and Permits
Before building or altering a foundation, check the local rules that apply to your property and project. Requirements vary by jurisdiction and scope of work, so there isn’t one answer for every Texas location. Contact your local building department and account for applicable requirements in the foundation and anchoring plan before construction begins.
-
Secure the Coop, Run, and Fencing
Connect the coop frame to ground anchors with secure hardware. Auger anchor kits commonly use anchors 15 or 30 inches deep. Another option is fastening the frame through its sole plate to concrete bolts with a washer and nut. To understand how to secure a coop against high winds, make sure the connection reaches the frame, not just a loose panel or covering.
- Secure run posts and fence panels at their connection points, too. Tie-down stakes can attach a coop to the ground, while a frame may be fastened to four-by-four posts set in concrete. Check that gates close and latches hold. Move the flock only if it’s safe; for particularly dangerous conditions, plan suitable temporary shelter in advance.
- After strong winds, inspect the coop before returning to normal use. Look for a shifted base, cracked joints, loose roof panels, bent fencing, debris, standing water, or signs of injury or illness. Don’t enter a visibly unstable structure until it’s safe. These checks can reveal damage that isn’t obvious from outside and show what needs repair before the next storm.
Maintaining ventilation while blocking wind and rain
Latch doors and protect vulnerable windows and vents from windblown debris, while keeping airflow open. During storms, opposite-facing windows can remain open approximately 2 to 3 inches for circulation.
- Check every opening before adding a windbreak. Close and securely latch doors, then inspect window frames, vent covers, and hinges for loose or damaged parts. Plywood can shield vulnerable windows and openings from flying debris, but don’t use it to block every source of airflow. Protect openings according to the direction of wind-driven rain and the coop’s ventilation layout.
- Preserve a path for fresh air through the coop. Openings on opposite-facing sides let air circulate, so keep them clear rather than covering both sides with solid barriers. During a storm, openings can be left approximately 2 to 3 inches open. Adjust their position to limit direct rain entry while maintaining airflow through the interior.
- Block rain on the exposed side without turning a tarp into a sail. Secure any covering so wind can’t get underneath or pull it loose, and avoid leaving a broad, loose edge facing the gusts. A tarp that catches the wind can strain its fastenings and nearby coop panels. Keep it clear of openings needed for ventilation.
- After adjusting openings, check the interior air and surfaces. Blocking airflow completely can allow dust, ammonia, carbon dioxide, and mold spores to build up. Look for damp bedding, a stale smell, or visible condensation, then restore a clear route for air to move. Don’t solve rain entry by sealing the coop so tightly that air becomes trapped.
- Recheck doors, windows, and vent protection as the wind shifts. A barrier that blocks rain from one direction may leave another opening exposed when gusts change direction. Keep latches fastened, remove loose coverings that flap or billow, and make sure plywood stays secure without blocking all ventilation. Once conditions ease, check the openings and interior for water entry or displaced materials.
Chicken coops still need adequate ventilation during storms. If airflow is fully blocked, dust, ammonia, carbon dioxide, and mold spores can build up inside. Treat airflow as a requirement when deciding where to shield the coop, not something to restore only after rain passes. Keep the protected area separate from the route air needs to move, and reassess when the wind changes. A barrier is useful only if it stays in place without sealing an opening.
A respondent said that a tarp should not catch the wind for the coop to be fine in the described conditions. That makes the tarp’s position as important as its coverage: avoid letting it billow across the ventilation route or leave loose material exposed to gusts. After adjusting a covering, check that air can still pass through the intended openings and that the tarp has not shifted. If the wind direction changes, reconsider which side needs rain protection while leaving airflow available. Continue to watch the interior for dampness, a stale smell, or condensation, and make another adjustment if the route for air has been obstructed.
Removing loose objects from the run
Before a storm, walk the run and nearby yard and clear anything wind could carry. Pay special attention to branches that could fall on the coop and loose objects that might hit the flock or damage fencing.
- Start at the coop and scan across the whole run. Pick up loose boards, scraps, empty containers, and lightweight yard items, then store them somewhere sheltered. Even a small object can become hazardous if a gust carries it toward a wall, window, or fence panel.
- Look above the coop and run for branches that could fall. Remove threatening branches before high winds arrive, and clear fallen limbs from the run. A branch resting against mesh can pull or bend it in the wind, while one on the roof can damage panels or block access.
- Check the ground for items that could roll, slide, or lift. Gather loose pots, buckets, toys, garden tools, and pieces of unused fencing. Put them in a stable, sheltered place rather than beside the run. Clear the center and edges, since objects near the perimeter can hit fencing first.
- Inspect the run’s perimeter for loose materials that could catch the wind. Secure or remove spare wire, scrap lumber, and detached coverings instead of leaning them against the fence. A loose sheet or panel can flap, pull at its attachment points, or strike the mesh. Keep the walking space clear for a calm, quick flock check.
- Make a final pass from the direction most exposed to the wind. Check behind the coop, beside gates, and around corners where an initial sweep can miss clutter. Move anything that could be carried into the run, including lightweight items near the fence. Leave no loose yard items exposed to gusts.
- After the storm, clear debris before letting the chickens use the run as usual. Look for fallen branches, scattered boards, and objects lodged against the fence. Remove hazards carefully, then inspect the mesh and gate for visible damage or obstruction. This follow-up catches windblown material that wasn’t there during the pre-storm cleanup.
Stabilizing coop feeders, waterers, and roosts
Secure interior equipment before a storm so feeders, waterers, and roosts stay put. Remove loose items that could shift or become airborne, while keeping feed and clean water available for the flock.
- Check each feeder and waterer for movement. If either can slide, tip, or swing, secure it to a stable part of the coop or move it out of the way. A loose feeder can spill feed, block a walkway, or strike a bird during a gust. Keep equipment clear of doors and roost access.
- Remove portable feeders and waterers before a storm if they could become projectiles. Chickens can go without food and water for the few hours it takes a storm to pass, so removing loose equipment can reduce hazards inside the coop. Store it in a protected place, then return it when conditions are safe.
- Plan for the hours and days after the storm, too. Keep enough feed and clean water on hand for the flock through the storm and afterward. Store chicken feed in a cool, dry place, preferably in a sealed plastic or metal container. This protects supplies and keeps loose bags out of wind and rain.
- Check every roost connection before severe weather. Press gently on each perch and inspect its supports, joints, and attachment points for looseness or visible damage. Tighten or repair unstable connections before birds settle for the night. A secure roost gives chickens a steady place to perch and keeps a loose bar from shifting across the coop.
- Consider flooding as well as wind when placing roosts and supplies. If water could collect inside the coop, position roosts high enough to keep chickens above standing water. Keep feed off the ground and containers away from places runoff could reach. A stable, elevated setup protects birds and supplies from wet flooring.
- Make a final equipment check before leaving the coop. Confirm that doors close without catching on a feeder, waterer, or perch, and that no container blocks the birds’ route to shelter. After the storm, inspect roosts, fixtures, and stored supplies before returning equipment. Replace spilled or wet feed, and provide clean water in a stable position.
How much wind can a chicken coop withstand?
There isn’t one wind-speed figure that applies to every coop. Wind exposure, construction, anchoring, and upkeep all affect how a structure responds, so assess these factors together.
- Judge the coop by its design, not a single wind-speed label. An open-design coop lets wind pass through, reducing pressure compared with a solid-walled shed or mobile home. That doesn’t make it immune to damage. Shape, condition, and placement still matter, especially if gusts can catch the roof, lift the base, or push against a broad, solid surface.
- Consider the wind conditions your property actually experiences. In one reported area, winds of 20 to 30 mph were considered relatively calm; another keeper described 30 mph winds four days out of seven and storm gusts up to 70 mph. These examples show how widely everyday exposure varies. Use local patterns and storm forecasts to guide preparation, not someone else’s “normal” wind.
- Remember that gusts can exceed the usual breeze. One keeper reported constant 50 mph winds on May 15, 2014, while another described a nearby town recording a 110 mph gust in March. These are individual reports, not a universal coop rating. They illustrate why a coop’s condition and exposure deserve attention before severe weather, rather than relying on a past calm-day experience.
- Inspect the parts that determine whether wind can shift the structure. Look for movement at the base, loose roof panels, weak joints, and unbraced frame sections. A raised coop can face greater wind strain as its exposed area increases; one recommendation is to keep it about a foot off the ground. Treat this as an example, not a design rule for every site.
- Use the inspection to set a practical storm plan. Secure the structure and roof, close and latch openings, and clear anything that could become airborne. If forecast conditions exceed what the coop and its anchoring can withstand, plan suitable shelter before dangerous weather arrives. A custom chicken coop can be tailored to local weather conditions; explore a custom chicken coop for a sturdier housing solution.
Keeping a raised coop a foot off the ground is one suggestion, based on the concern that greater height can increase wind strain. Treat it as a point to consider, not a guarantee of safety or a universal measurement. Assess the coop’s anchoring, frame, roof, and exposure together. If the base is raised, pay particular attention to its stability and the condition of its supports and connections. A coop that feels secure in ordinary conditions may still need attention when strong gusts are expected.
Before changing the height or moving the structure, consider how the adjustment affects access, stability, and protection for the birds. Check that doors and other openings can still be secured and that the roof remains firmly attached to the frame. Revisit these checks after repairs, site changes, or harsh weather. Consider the coop’s condition when deciding whether it’s suitable for a forecast, and arrange safer shelter if you have doubts. Wind readiness depends on the whole setup: construction, maintenance, placement, and anchoring, not height alone.
Southern Chicken Coops: Coop Delivery
Southern Chicken Coops offers custom chicken coops for keepers planning a sturdy home suited to their flock and local weather. Its 6'x12' Polka model is designed for durability and functionality in the Texas climate, while semi-custom designs can be tailored to specific needs. Coop Delivery helps make a handcrafted coop the next step when you’re ready to move from storm preparation to choosing a lasting shelter.
A new coop still needs thoughtful placement and anchoring suited to its site. Consider how its design, foundation, and exposure work together before severe weather arrives, while keeping the flock’s daily needs in view.
Contact Southern Chicken Coops to discuss a coop for your flock.
Make Storm Preparation Part of Your Routine
A dependable routine for how to secure a coop against high winds starts before a forecast feels urgent. Choose a regular time to walk the property, notice changes around the coop, and consider what you’d do if severe weather approached. A tree limb may weaken, a gate may loosen, or the flock’s usual shelter may need attention. Knowing the setup makes it easier to spot changes.
Keep your storm plan simple enough to follow under pressure. Decide where the chickens can shelter if conditions threaten their usual space, and make sure everyone in your household understands the plan. Once dangerous weather arrives, protect your own safety rather than taking risks to check on the flock. Preparation is an act of care, not a reason to face unsafe conditions.
If you’re considering a coop suited to your flock and setting, contact Southern Chicken Coops to start a conversation. A thoughtful next step today can help you care for your chickens with greater confidence through changing seasons.
Frequently Asked Questions
How to anchor a chicken coop to the ground against high winds?
For a post-supported coop, sink the supports at least 2 feet into the ground or below the local frost line, and set them in concrete. Attach the coop walls to those posts so the frame and foundation work together. Before storms, inspect the connections for movement, loose fasteners, or cracks around the supports, then address any weakness while conditions are safe.
Best hurricane straps and anchors for securing a chicken coop
Use secure hardware to connect the frame to ground anchors. Options include auger anchors, tie-down stakes, concrete bolts, or four-by-four posts set in concrete. Hurricane straps, reinforced joints, and cross-bracing can strengthen the structure, but no single material is best for every setup.
How to reinforce a chicken coop roof against wind uplift
Secure roof panels with high-wind screws, which have thicker screws and wider washers than standard roof screws. Prioritize the front and rear purlins, and fasten panels at every other crest.


