

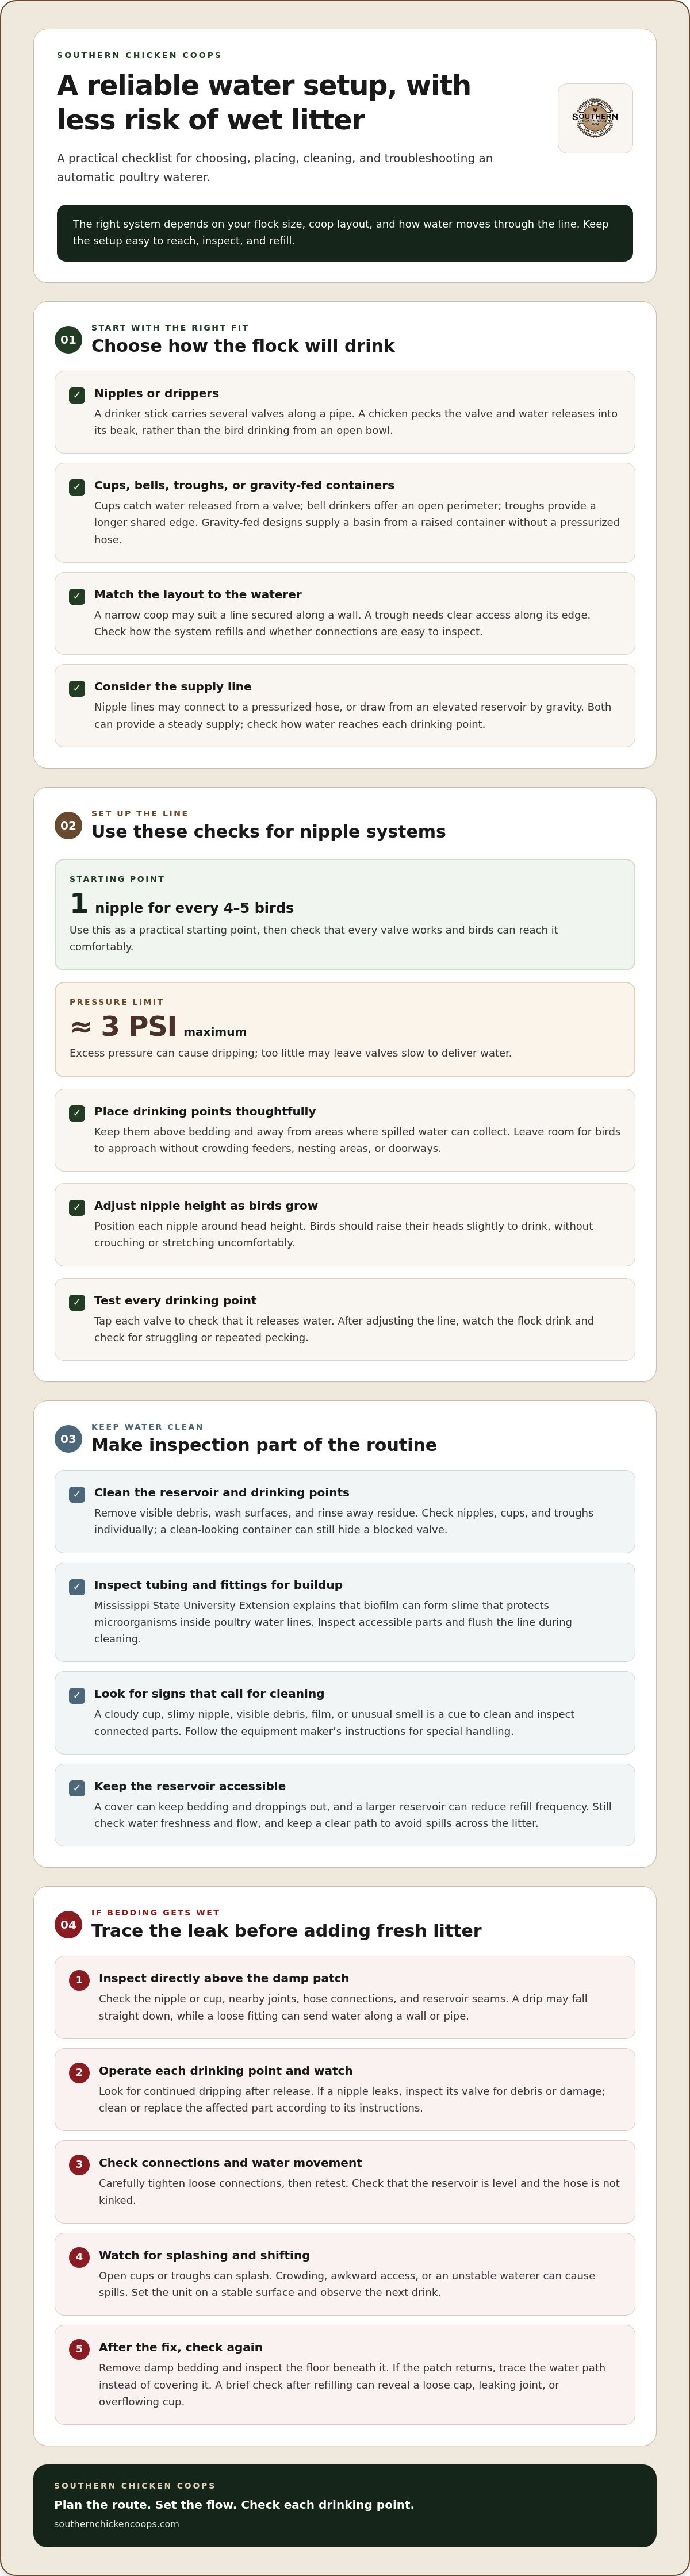
A dependable coop water setup starts with a delivery method that suits the flock, not the most complicated gear. Automated chicken feeder and waterer systems can use drinker sticks with drippers or bowls supplied by a pressurized hose; gravity-fed and hose-fed options both provide steady access to fresh water. For nipple systems, a practical starting point is one nipple for every 4-5 birds, with water pressure kept at a maximum of approximately 3 PSI.
It’s understandable to want an automated chicken feeder and waterer system that saves daily effort without leaving puddles or damp litter. The right setup depends on flock size, coop layout, and how water moves through the line, so a small backyard flock and a larger group may need different arrangements.
This guide explains how automatic poultry waterers work, how to reduce leaks and wet litter, and how to choose an approach for your flock. It also covers feeders, cleaning, and practical setup choices to help you plan for a Texas coop.
Key Takeaways
- For nipple-based waterers, start with one nipple for every 4-5 birds and keep pressure at a maximum of approximately 3 PSI to help limit leaks.
- Clean water lines regularly: Mississippi State University Extension explains that biofilm can protect microorganisms inside poultry water lines.
- Match accessories to your coop’s conditions. A poultry drinker heater cable rated at 12V DC and 5W is one option to learn about for waterer setups.
- For flocks with more than 20 birds, a silo drinker or multi-nipple arrangement can be a useful starting point; introduce chicks to automatic waterers after 1-2 weeks on traditional dishes.
- Consider how flock size and coop layout shape your setup, then explore how a custom coop can accommodate the way you care for your birds.
What Is an Automatic Poultry Waterer?
An automatic poultry waterer supplies drinking points from a reservoir or water line. For Texas coops, common options include nipples, cups, bell drinkers, troughs, and gravity-fed containers.
Dripper and Nipple Mechanisms
A drinker stick carries several nipples or drippers along a pipe. When a chicken pecks the valve, water releases into its beak; the bird controls each drink rather than standing over an open bowl. A starting point is one nipple for every 4-5 birds. Check that each valve releases water when tapped and that birds can reach it comfortably.
Some nipple lines connect to a pressurized hose; gravity-fed designs draw water from an elevated reservoir. Both can provide a steady supply. Check how the system refills, whether you can inspect the connections easily, and how water reaches each drinking point.
Waterer Types
Nipple waterers keep the drinking point relatively contained, while cup waterers catch water released from a valve. Bell drinkers provide an open perimeter for several birds, and troughs offer a longer shared edge. Gravity-fed waterers supply a basin from a raised container without a pressurized hose. Each design differs in access, refill method, and exposure to litter.
Choose a waterer that suits the flock and its location. A narrow coop may suit a line secured along a wall, while a trough needs clear access along its edge. Check cups and nipples regularly: a container that looks clean doesn’t show whether every valve is working.
Placement, Pressure, and Nipple Height
Set a water line where birds can approach without crowding feeders, nesting areas, or doorways. Keep the drinking points above bedding and away from spots where spilled water can collect. For nipple-based chicken waterers, keep pressure at a maximum of approximately 3 PSI. Excess pressure can cause dripping, while too little may leave valves slow to deliver water.
Position each nipple around the birds’ head height, adjusting it as the flock grows. Chickens should raise their heads slightly to drink, without crouching or stretching uncomfortably. Test every nipple after adjusting the line, and watch whether the birds can drink without struggling or pecking repeatedly.
How much feed and water do chickens need each day? Needs depend on age, body size, laying status, feed type, and Texas heat. Track feed and water use, refill levels, and appetite. A noticeable change may signal a supply problem or a change in the flock.
Automated feeders can help reduce waste and pest access when they keep feed contained between meals. A treadle feeder, for example, opens its compartment when a chicken steps on the platform. Keep it stable, clear spilled grain promptly, and check that every bird can operate it and reach the feed.
When comparing automated chicken feeder and waterer systems, map the coop’s walking paths and water-line route before installation. A short test run can reveal hard-to-reach nipples, awkward refill access, and damp patches before they become routine problems.
Cleaning, leak prevention, and wet-litter troubleshooting
Automatic waterers can reduce routine refilling, but still need inspection and cleaning. Check reservoirs, connections, valves, and bedding regularly to catch problems early.
Cleaning and Maintenance
Start with the reservoir and drinking points: remove visible debris, wash the surfaces, and rinse away residue. Check nipples, cups, and troughs individually, since a clean container can still hide a blocked valve. Follow the equipment maker’s cleaning instructions for parts that need special handling.
Water lines need attention, too. Mississippi State University Extension explains that biofilm can form slime that protects microorganisms inside poultry water lines. Inspect accessible tubing and fittings for buildup, and flush the line during cleaning so loosened residue doesn’t remain in the system. A cloudy cup or slimy nipple is a cue to clean and inspect connected parts.
A covered reservoir can keep bedding and droppings out, while a larger reservoir can reduce refill frequency. Neither eliminates the need to check water freshness and flow. Make inspection part of your regular coop routine, and clean sooner if debris, film, or an unusual smell appears. Keep a clear path to the reservoir to avoid spilling water across the litter.
Leak Prevention and Wet Litter
When you find wet bedding, locate the source before adding fresh litter. Check directly above the damp patch: inspect the nipple or cup, nearby joints, hose connections, and reservoir seams. A dripping valve can wet the bedding below, while a loose fitting can send water along a wall or pipe.
Operate each drinking point and watch for continued dripping. Carefully tighten loose connections, then retest the line. If a nipple leaks after release, inspect its valve for debris or damage and clean or replace the affected part according to its instructions. Check that the reservoir is level and the hose isn’t kinked.
Wet litter can also come from water splashing out of open cups or troughs. Watch the flock drink: crowding, awkward access, or a waterer that shifts can cause spills. Move the unit onto a stable surface, clear bedding from its drinking edge, and observe the next drink to see whether the change helps.
After fixing a leak, remove damp bedding and check the floor beneath it. If the patch returns, trace the water path instead of covering it with dry litter. A brief inspection after refilling can reveal a loose cap, leaking joint, or overflowing cup before the problem spreads.
Feeder and waterer accessories
Accessories can help a watering setup suit its location and routine. For a Texas coop, consider how the system handles cold weather, how securely components attach, and whether each part is accessible for inspection.
Cold-Weather Waterer Accessories
A poultry drinker heater cable can help address freezing conditions around a waterer. One listed option is 16 inches long and rated at 12V DC and 5W. Treat those values as compatibility details, not a universal fit: match the cable to the waterer and follow the equipment instructions for placement and connection.
A Chicken Fountain can be paired with a stock tank heater in freezing temperatures. Set them up so the heater doesn’t block drinking access or make refilling awkward. Position the equipment so you can see the water surface and inspect the connection during regular coop checks.
Cold-weather accessories don’t replace water checks. During a cold spell, inspect the drinking points and reservoir, and remove any obstruction before birds rely on the system. A cable or heater helps only when positioned correctly and compatible with the setup.
Mounting and Refill Accessories
Mounting brackets, clips, and supports can steady a water line or container. Before adding one, trace the route from the reservoir to the drinking points and identify where a loose or sagging line might strain a joint. Secure the line without pinching it, then operate each valve and watch for movement or drips.
A lid or cover can help keep feathers, litter, and droppings out of an open reservoir. Choose one that you can remove for cleaning without shifting the whole system. For example, a hinged cover can make routine inspection easier when the waterer sits close to a coop wall.
Choosing Useful Accessories
Start with the problem you want to solve: cold water, a shifting line, debris in a reservoir, or inconvenient refilling. Add an accessory that addresses that issue, then test the setup before relying on it. This keeps the system easier to inspect and avoids fittings that crowd the coop.
For an accessory checklist, note the waterer type, connection style, mounting surface, and available power source. Compare those details with the accessory’s stated requirements; the 12V DC and 5W rating on a heater cable, for instance, should not be assumed to suit every installation. Keep instructions nearby, inspect connections after setup, and observe the flock using the changed arrangement.
Well-chosen accessories support daily care, but don’t replace cleaning or flow checks. A heater, cover, or bracket is most useful when it fits the system and remains accessible for inspection.
High-capacity silo waterers
A silo waterer stores water above a drinking base, then replenishes the base as birds drink. Its larger reservoir can reduce refill trips, but flock size, access, and placement still determine whether it suits a coop. For flocks with more than 20 birds, a silo drinker or multi-nipple setup is a practical starting option.
Plan the refill routine before choosing a location. A full reservoir can be awkward to carry, so place the unit where you can reach its opening without stepping over birds or equipment. Keep the route from the coop entrance clear, and choose a stable, level surface to prevent the base from tipping.
Capacity alone doesn’t determine whether a silo waterer will work well. Observe how quickly the flock empties it, whether every bird can reach the drinking edge, and how often the reservoir needs attention. If birds gather on one side, rotate or reposition the unit to improve access. Check water levels as part of your regular coop routine.
Fit the Silo to the Flock and Coop
Count the birds using the waterer and watch for crowding during busy drinking periods. A silo may be a poor fit if its base offers comfortable access to only a few birds at once. Compare it with a multi-nipple arrangement or a second drinking point, then observe whether the flock spreads out.
Measure the available floor space and allow room to refill the silo. A unit tucked behind a feeder may be difficult to lift or open, while one in a narrow path can interrupt movement. Leave a clear approach and keep the reservoir away from bedding and droppings.
Set Up and Observe
Before filling a new silo, assemble it on a level surface and check that the reservoir and base fit securely. Add water, watch the base as it fills, and confirm that the unit remains stable when birds gather around it. Recheck after moving the waterer or changing the coop layout.
In a Texas coop, keep the waterer accessible in hot weather and inspect it during routine checks. If freezing temperatures are expected, a Chicken Fountain can be paired with a stock tank heater. Keep the drinking area accessible and follow the heater’s instructions for placement and use.
Record refill frequency and note changes in flock behavior. If a silo empties sooner than expected, check for leaks, spillage, or increased demand before assuming the reservoir is too small. If the water remains unused, confirm that birds can reach the base comfortably. These observations help you decide whether the silo’s size and position suit your flock.
Waterer systems for backyard flocks and larger coops
Choose feeder and waterer capacity based on flock size, access, and how often you can refill. Leave enough room for birds to eat and drink without crowding, then monitor use and adjust as the flock’s needs change.
Systems for Different Coop Sizes
A backyard flock may suit a simple gravity-fed drinker or a compact trough that’s easy to refill and clean. For a larger group, a silo drinker or multi-nipple setup is a useful starting point when the flock exceeds 20 birds. Compare how many birds can drink at once, not just the reservoir size.
Coop layout matters, too. A long, narrow space may suit a water line or trough along an accessible wall. A larger floor plan can accommodate separate drinking points and help prevent bottlenecks. Keep refill access clear so the waterer is practical to use.
Capacity by Flock Size
For feeder capacity, consider how quickly the flock empties the hopper and whether every bird can reach the feed. For water, track reservoir levels and watch for crowding or waiting. If the supply runs out before your next refill, choose a larger supply or add another accessible drinking point.
Choose a setup that fits the routine you can maintain. A backyard keeper who checks the coop often may prefer a smaller container that’s simple to clean, while a larger flock may benefit from a higher-capacity supply. Don’t judge by volume alone: placement, access, and ease of cleaning matter, too.
For a shared trough option, the Automatic Water Troughs two-pack includes two troughs. Two drinking locations can help distribute access across a coop, provided both stay reachable and are easy to inspect. A Floating Valve is 12 inches long; consider its dimensions and fit when planning a trough arrangement.
Young birds need a gradual introduction to automatic drinking points. Start chicks on traditional dishes for 1-2 weeks before introducing automatic waterers, and observe whether they can find and use the new system. That transition helps you spot access problems before relying on the automatic setup.
Use a simple observation routine to guide adjustments: watch the flock drink, note which points they use, and check feed and water levels during regular care. If birds cluster in one spot, move a drinking point or add another. If a reservoir stays full while birds wait, improve access rather than simply increasing capacity.
The best arrangement balances supply with coop space and daily care. Match the equipment to the number of birds using it, then reassess after flock changes or layout adjustments. A well-planned setup makes feeding and watering easier to manage without limiting access.
Southern Chicken Coops: Custom Chicken Coops
Southern Chicken Coops offers Custom Chicken Coops for poultry keepers planning a coop around their flock and daily routine. If your waterer needs a clear refill path, an accessible placement, or room for more than one drinking point, consider these needs while planning the coop layout. The signature Polka model is a 6'x12' coop designed for durability and functionality in the Texas climate, and semi-custom designs can be tailored to specific needs.
Thoughtful coop planning brings feeding, watering, and routine care together in the space. Southern Chicken Coops builds custom chicken coops and offers delivery of completed coops to a prepared, level lot. If you’re planning a coop for your flock, contact Southern Chicken Coops or visit southernchickencoops.com.
Build Your Coop Plan Around Daily Care
Sketch how feeding and watering will fit into the coop you want. Mark where birds gather, where you’ll refill containers, and how you’ll reach each area during routine care. This practical plan helps you look beyond equipment alone and shape a space that works for your flock as it grows.
Southern Chicken Coops builds custom chicken coops and delivers completed coops to prepared, level lots. Bring your layout ideas and flock-care priorities into the planning process so the coop and daily routines work together. A well-planned home should support the way you care for your birds.
Ready to talk through your coop plans? Contact Southern Chicken Coops and take a thoughtful next step toward a well-planned home for your flock.
Frequently Asked Questions
What types of automated chicken feeder and waterer systems are available?
Automated chicken feeder and waterer systems can combine gravity hoppers, treadle feeders, nipple lines, cups, bell drinkers, troughs, or gravity-fed reservoirs. The right choice depends on how birds access feed and water and how the equipment fits your coop. A treadle feeder, for example, can keep feed covered between visits, while a gravity hopper releases more feed as birds eat. Consider cleaning and refill access, too.
How do automatic chicken feeders and waterers work?
Automatic feeders replenish the feeding area as chickens eat. In a gravity hopper, feed drops from a storage container into a tray; a treadle model opens access when a bird steps on its platform. Waterers use a reservoir, hose, or line to supply drinking points. A nipple releases water when pecked, while a float valve can regulate water entering a trough. Test moving parts before birds use them.
How do nipple, cup, and bell-style automatic chicken waterers compare?
Nipple systems keep water contained at individual drinking points, while cups catch water released through a valve. Bell drinkers provide a shared drinking edge around the base. Compare the space birds need to gather with how easily you can reach the drinking surface for cleaning. A crowded corner may make a bell base awkward, while cups can be easier to inspect individually.
How to install and maintain an automated chicken feeder and waterer?
Choose firm, level locations that don’t block coop doors or pathways. Secure hanging equipment so it can’t swing, and route hoses where birds and people won’t snag them. Before filling the coop, operate each feeder mechanism and water outlet, then watch for movement, spills, or restricted access. During regular upkeep, remove old feed, clear tray debris, inspect fasteners and tubing, and replace damaged parts according to instructions.
What are common problems and safety risks with automatic chicken feeder and waterer systems?
Blocked feed openings, jammed treadles, kinked hoses, and stuck valves can interrupt access. Spilled feed may attract pests, while unnoticed drips can dampen bedding. Handle electrical accessories according to their instructions, keeping cords and connections away from water and places where birds can peck or pull them. Check that every bird can reach the equipment, and keep a familiar backup dish available during repairs or interruptions.
How can automated chicken feeders prevent rodents, pests, and feed waste?
Automated feeders can reduce feed waste and pest access when they keep feed contained between meals. A treadle feeder opens its compartment when a chicken steps on the platform.


